Whether you buy one or build your own, adding a fire pit to the yard or patio creates an elegant and cozy focal point for your outdoor living space. Great for outdoor entertaining or an intimate evening at home any time of year, fire pits are available in a myriad of sizes and styles and add style and function to your property. Maintenance is key towards keeping your backyard showpiece looking and functioning well all year long.
Both wood-burning fire pits and those with gas burners need maintenance and regular cleaning to safeguard their beauty and keep them as an eye-catching focal point in your yard. Whilst they create a wonderful focal point for an entertaining area outdoors, it does leave them at the mercy of Mother Nature and the elements. Rain, snow, ice and the sun’s rays all take a heavy toll on a fire pit, even those of the highest quality. Hands down, the best protection you can provide for your fire pit is to use a cover when it is not in use. If yours is a portable fire pit and is not used for extended periods of time, storing it inside or under a dry covered area is the best option. If you do this you will not only be preserving the lifespan of your fire pit and protecting your investment you will also be reducing the amount of maintenance needed to keep it looking and performing at its best. Covers are available in all shapes and sizes so finding one to suit should not be a problem.
8 Simple Tips to Make Your Fire Pit Last
- Choose a high quality product
Arguably, the most important thing you can do is choose a high-quality fire pit, such as those offered here at The Fire Pit Company.
- Watch What you Burn
When using your fire pit, you should avoid burning trash or pressure-treated lumber. Instead, choose natural, locally sourced wood that’s dry and not wet. Burning trash and/or pressure-treated lumber may release toxic fumes and chemicals, some of which may damage your fire pit over time (not to mention its bad for your health). And wet wood simply doesn’t burn as easily, so you may struggle to get it lit.
- Don’t use lighter fluid
Assuming you use dry wood, you should be able to light your fire pit using nothing more than small pieces of tinder and kindling. You shouldn’t, however, use lighter fluid to get it going. Aside from the risk of bodily harm and property damage it poses, lighter fluid may damage the finish on your fire pit. It’s doubtful any noticeable damage will occur after just one or two uses of lighter fluid. Nonetheless, it’s best to err on the side of caution by avoiding lighter fluid altogether.
- Allow fire to extinguish naturally
Sure, it’s easier and faster to extinguish your fire pit by dousing it with water, but this increases the risk of damage. Unless it’s an emergency situation and you need to get the fire out ASAP, you should await for the fire to extinguish naturally. Dousing a still-burning fire pit with water causes sudden temperature changes. The 1,000-degree fire is suddenly cooled, which can lead to weaken the fire pit’s structural integrity.
- Clean the Grate before and after cooking
If you use your fire pit for cooking — as most owners do — you should clean the grate both before and after cooking on it. A wire grill brush is an excellent accessory that every home chef needs. Using a wire brush, you can scrub your fire pit’s grate to remove any stubborn food or debris. Failure to do so will result in food particles hardening onto the grate.
Also, consider applying cooking oil over the grate before adding your food. A thin layer of vegetable oil will “season” it, while also discouraging rust and corrosion. You can experiment with different types of cooking oils, though many home chefs prefer traditional vegetable oil because of its high smoking point and ease of use.
- Keep it covered
Don’t leave your fire pit exposed to the elements. Ideally, you should either place it under a covered area or use a grill cover to protect it from the rain. Without some type of protection, your fire pit will get soaked — and this can lead to rust and corrosion. Keeping your fire pit dry is essential to preserving its structural integrity and original appearance.
- Remove Ashes
When you are finished using your fire pit, wait at least 24 hours for the fire to extinguish and the ash to cool. Once it has cooled, you can dispose of the ash by scooping it out with a shovel and transferring it to a safe, non-flammable metal container. Never attempt to remove ash that’s still hot. Even if it looks gray and cool-to-the-touch, it could hold enough heat to spark a second fire.
- Wipe off soot and residue
When fire pits burn, they’ll produce small amounts of smoke. And within this smoke is soot, which can stick to the surface of your fire pit. Soot isn’t a serious concern, but it’s a good idea to remove it nonetheless. After your fire pit has cooled (about 24 hours), wipe down the surface with a damp paper towel. You don’t have to use any special cleaning products, as a small amount of water should suffice, leaving your fire pit looking nice and clean.
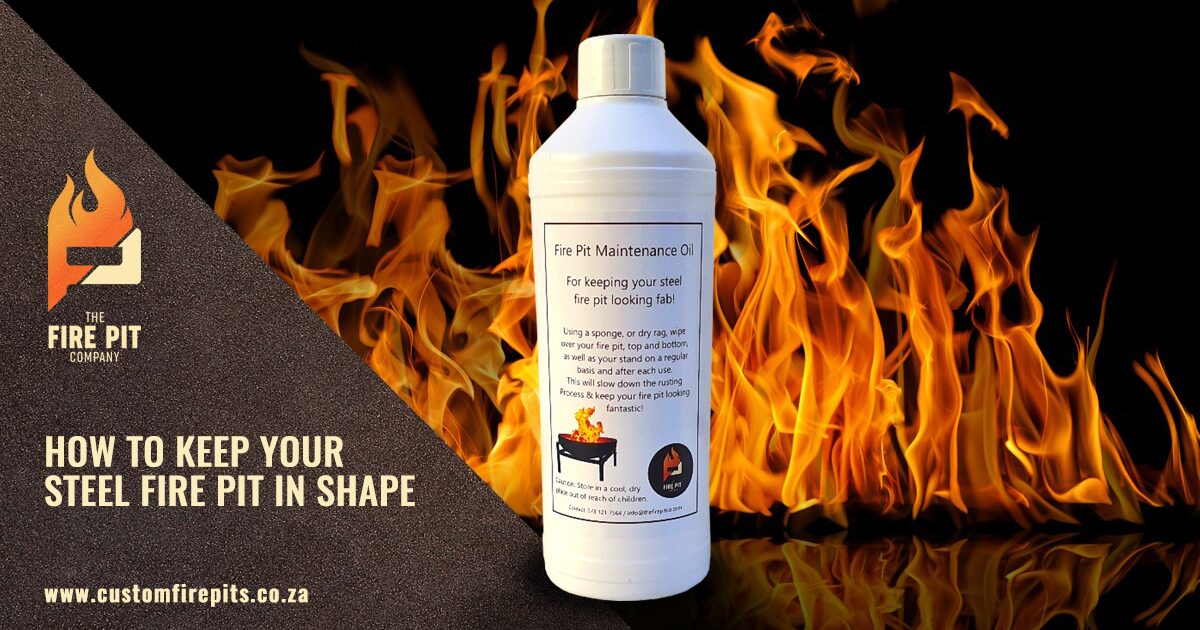
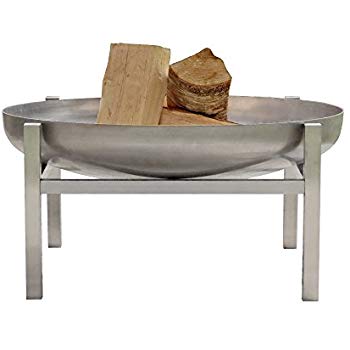
Steel
Dust regularly with a soft, dry cloth. Do not use coarse abrasive powders, metallic scourers, silver or brass cleaners. Steel is not rust proof and should not be wiped down with a damp cloth.
Iron
Cast iron fire pits are a little more difficult to clean than steel or masonry fire pits because they develop a natural top layer of rust which does not harm the fire bowl. Wipe with a slightly damp cotton cloth or some steel wool to remove dust. Never use harsh chemicals to clean spots and spills. Iron is not rust proof. Keep dry.
Copper
Copper fire pits will naturally patinate over time. Once used, your copper fire pit will accumulate a layer of soot. Removing this layer of soot is fairly easy and won’t damage the patina. Prepare a natural cleaning solution of 1 cup salt to 1 gallon of vinegar. To use, dampen a cloth in the cleaning solution and scrub well.
In Ground Stone Pit:
Permanent pit installations serve as beautiful focal points in any yard. While they are very durable and can typically handle year-round weather conditions without a lot of maintenance, they still require occasional cleaning. While not necessary, consider buying a simple fireplace toolkit. A typical set includes an ash scoop, a long poker and log tongs, and it will make tending your fire much easier.
Caring for your Fire Pit
Whether you buy one or build your own, adding a fire pit to the yard or patio creates an elegant and cozy focal point for your outdoor living space. Great for outdoor entertaining or an intimate evening at home any time of year, fire pits are available in a myriad of sizes and styles and add style and function to your property. Maintenance is key towards keeping your backyard showpiece looking and functioning well all year long.
Both wood-burning fire pits and those with gas burners need maintenance and regular cleaning to safeguard their beauty and keep them as an eye-catching focal point in your yard. Whilst they create a wonderful focal point for an entertaining area outdoors, it does leave them at the mercy of Mother Nature and the elements. Rain, snow, ice and the sun’s rays all take a heavy toll on a fire pit, even those of the highest quality. Hands down, the best protection you can provide for your fire pit is to use a cover when it is not in use. If yours is a portable fire pit and is not used for extended periods of time, storing it inside or under a dry covered area is the best option. If you do this you will not only be preserving the lifespan of your fire pit and protecting your investment you will also be reducing the amount of maintenance needed to keep it looking and performing at its best. Covers are available in all shapes and sizes so finding one to suit should not be a problem.
8 Simple Tips to Make Your Fire Pit Last
- Choose a high quality product
Arguably, the most important thing you can do is choose a high-quality fire pit, such as those offered here at The Fire Pit Company.
- Watch What you Burn
When using your fire pit, you should avoid burning trash or pressure-treated lumber. Instead, choose natural, locally sourced wood that’s dry and not wet. Burning trash and/or pressure-treated lumber may release toxic fumes and chemicals, some of which may damage your fire pit over time (not to mention its bad for your health). And wet wood simply doesn’t burn as easily, so you may struggle to get it lit.
- Don’t use lighter fluid
Assuming you use dry wood, you should be able to light your fire pit using nothing more than small pieces of tinder and kindling. You shouldn’t, however, use lighter fluid to get it going. Aside from the risk of bodily harm and property damage it poses, lighter fluid may damage the finish on your fire pit. It’s doubtful any noticeable damage will occur after just one or two uses of lighter fluid. Nonetheless, it’s best to err on the side of caution by avoiding lighter fluid altogether.
- Allow fire to extinguish naturally
Sure, it’s easier and faster to extinguish your fire pit by dousing it with water, but this increases the risk of damage. Unless it’s an emergency situation and you need to get the fire out ASAP, you should await for the fire to extinguish naturally. Dousing a still-burning fire pit with water causes sudden temperature changes. The 1,000-degree fire is suddenly cooled, which can lead to weaken the fire pit’s structural integrity.
- Clean the Grate before and after cooking
If you use your fire pit for cooking — as most owners do — you should clean the grate both before and after cooking on it. A wire grill brush is an excellent accessory that every home chef needs. Using a wire brush, you can scrub your fire pit’s grate to remove any stubborn food or debris. Failure to do so will result in food particles hardening onto the grate.
Also, consider applying cooking oil over the grate before adding your food. A thin layer of vegetable oil will “season” it, while also discouraging rust and corrosion. You can experiment with different types of cooking oils, though many home chefs prefer traditional vegetable oil because of its high smoking point and ease of use.
- Keep it covered
Don’t leave your fire pit exposed to the elements. Ideally, you should either place it under a covered area or use a grill cover to protect it from the rain. Without some type of protection, your fire pit will get soaked — and this can lead to rust and corrosion. Keeping your fire pit dry is essential to preserving its structural integrity and original appearance.
- Remove Ashes
When you are finished using your fire pit, wait at least 24 hours for the fire to extinguish and the ash to cool. Once it has cooled, you can dispose of the ash by scooping it out with a shovel and transferring it to a safe, non-flammable metal container. Never attempt to remove ash that’s still hot. Even if it looks gray and cool-to-the-touch, it could hold enough heat to spark a second fire.
- Wipe off soot and residue
When fire pits burn, they’ll produce small amounts of smoke. And within this smoke is soot, which can stick to the surface of your fire pit. Soot isn’t a serious concern, but it’s a good idea to remove it nonetheless. After your fire pit has cooled (about 24 hours), wipe down the surface with a damp paper towel. You don’t have to use any special cleaning products, as a small amount of water should suffice, leaving your fire pit looking nice and clean.
Steel
Dust regularly with a soft, dry cloth. Do not use coarse abrasive powders, metallic scourers, silver or brass cleaners. Steel is not rust proof and should not be wiped down with a damp cloth.
Iron
Cast iron fire pits are a little more difficult to clean than steel or masonry fire pits because they develop a natural top layer of rust which does not harm the fire bowl. Wipe with a slightly damp cotton cloth or some steel wool to remove dust. Never use harsh chemicals to clean spots and spills. Iron is not rust proof. Keep dry.
Copper
Copper fire pits will naturally patinate over time. Once used, your copper fire pit will accumulate a layer of soot. Removing this layer of soot is fairly easy and won’t damage the patina. Prepare a natural cleaning solution of 1 cup salt to 1 gallon of vinegar. To use, dampen a cloth in the cleaning solution and scrub well.
In Ground Stone Pit:
Permanent pit installations serve as beautiful focal points in any yard. While they are very durable and can typically handle year-round weather conditions without a lot of maintenance, they still require occasional cleaning. While not necessary, consider buying a simple fireplace toolkit. A typical set includes an ash scoop, a long poker and log tongs, and it will make tending your fire much easier.